 KVM虚拟机安装
# 创建和管理虚拟机
可以使用virt-manager命令行,XML文件等方法创建。
使用的宿主机环境为VMware虚拟机,需要在宿主机CentOS中开启嵌套虚拟化:
# 默认没有开启
$ cat /sys/module/kvm_intel/parameters/nested
N
# 重新加载kvm内核
$ sudo modprobe -r kvm_intel
$ sudo modprobe  kvm_intel nested=1
# 再次查看
$  cat /sys/module/kvm_intel/parameters/nested
Y
1
2
3
4
5
6
7
8
9
2
3
4
5
6
7
8
9
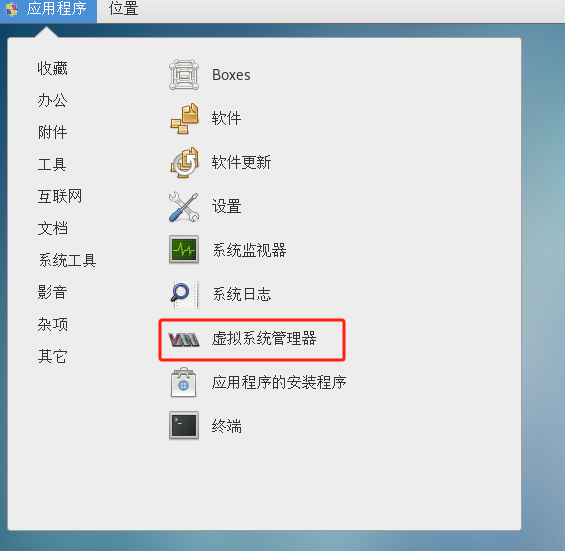
# 使用virt-manager创建虚拟机
使用命令行virt-manager启动:
或
[root@localhost ~]# virt-manager
1
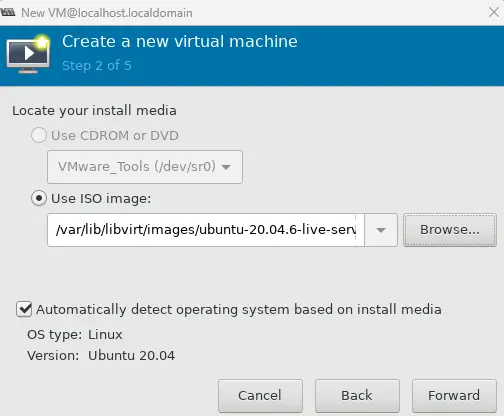
创建虚拟机:

将系统iso上传到宿主机的/var/lib/libvirt/images,光驱文件选择iso:
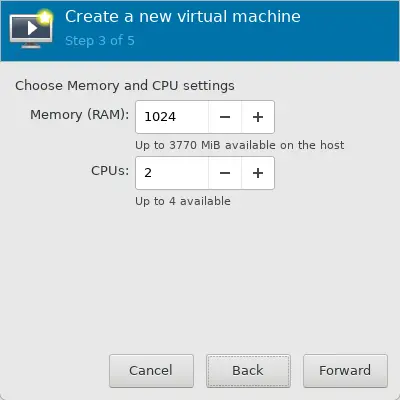
设置cpu和内存:
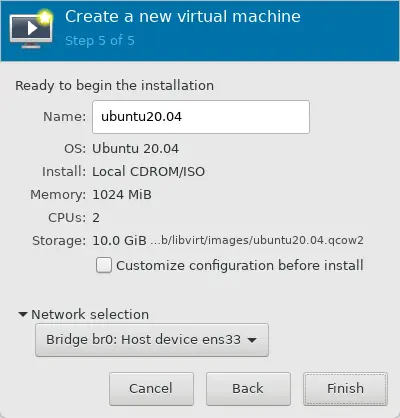
设置存储,磁盘放置在default存储池中:

设置网络为br0网桥:
- 图形⽅式(⾮常重要 ⾮常简单)
- 完全⽂本模式(现场配置虚拟机的规格)
- 命令⾏模式(重中之重 最常⽤ 模板镜像+配置⽂件 ⽅式配置规格)
# 使用命令⾏模式创建虚拟机(重中之重 最常⽤ 模板镜像+配置⽂件 ⽅式配置规格)
# 虚拟机配置⽂件
# ls /etc/libvirt/qemu

networks vm1.xml
1
2
3
2
3
# 虚拟机的存储文件
# ls /var/lib/libvirt/images/

vm1.qcow2
1
2
3
2
3
# 操作步骤
- 需要有磁盘镜像⽂件:
[root@localhost ~]# sudo cp /var/lib/libvirt/images/vm1.qcow2 /var/lib/libvirt/images/vm2.qcow2
1
- 需要有配置⽂件
[root@localhost ~]# sudo cp /etc/libvirt/qemu/vm1.xml /etc/libvirt/qemu/vm2.xml
1
- 配置⽂件需要修改必要的内容
[root@localhost ~]# sudo vim /etc/libvirt/qemu/vm2.xml
1
修改为如下内容,主要修改了
vm2 修改名称
0f6069e0-652e-4107-8675-1bf8548449b9 随便可以修改一位修改最后的名称即可
mac地址只能修改后3段,即:1f:c1:d1
<!--
WARNING: THIS IS AN AUTO-GENERATED FILE. CHANGES TO IT ARE LIKELY TO BE
OVERWRITTEN AND LOST. Changes to this xml configuration should be made using:
  virsh edit vm1
or other application using the libvirt API.
-->

<domain type='kvm'>
  <name>vm2</name>
  <uuid>0f6069e0-652e-4107-8675-1bf8548449b9</uuid>
  <memory unit='KiB'>1048576</memory>
  <currentMemory unit='KiB'>1048576</currentMemory>
  <vcpu placement='static'>1</vcpu>
  <os>
    <type arch='x86_64' machine='pc-i440fx-rhel7.0.0'>hvm</type>
    <boot dev='hd'/>
  </os>
  <features>
    <acpi/>
    <apic/>
  </features>
  <cpu mode='custom' match='exact' check='partial'>
    <model fallback='allow'>Broadwell-noTSX-IBRS</model>
    <feature policy='require' name='md-clear'/>
    <feature policy='require' name='spec-ctrl'/>
    <feature policy='require' name='ssbd'/>
  </cpu>
  <clock offset='utc'>
    <timer name='rtc' tickpolicy='catchup'/>
    <timer name='pit' tickpolicy='delay'/>
    <timer name='hpet' present='no'/>
  </clock>
  <on_poweroff>destroy</on_poweroff>
  <on_reboot>restart</on_reboot>
  <on_crash>destroy</on_crash>
  <pm>
    <suspend-to-mem enabled='no'/>
    <suspend-to-disk enabled='no'/>
  </pm>
  <devices>
    <emulator>/usr/libexec/qemu-kvm</emulator>
    <disk type='file' device='disk'>
      <driver name='qemu' type='qcow2'/>
      <source file='/var/lib/libvirt/images/vm2.qcow2'/>
      <target dev='hda' bus='ide'/>
      <address type='drive' controller='0' bus='0' target='0' unit='0'/>
    </disk>
    <disk type='file' device='cdrom'>
      <driver name='qemu' type='raw'/>
      <target dev='hdb' bus='ide'/>
      <readonly/>
      <address type='drive' controller='0' bus='0' target='0' unit='1'/>
    </disk>
    <controller type='usb' index='0' model='ich9-ehci1'>
      <address type='pci' domain='0x0000' bus='0x00' slot='0x05' function='0x7'/>
    </controller>
    <controller type='usb' index='0' model='ich9-uhci1'>
      <master startport='0'/>
      <address type='pci' domain='0x0000' bus='0x00' slot='0x05' function='0x0' multifunction='on'/>
    </controller>
    <controller type='usb' index='0' model='ich9-uhci2'>
      <master startport='2'/>
      <address type='pci' domain='0x0000' bus='0x00' slot='0x05' function='0x1'/>
    </controller>
    <controller type='usb' index='0' model='ich9-uhci3'>
      <master startport='4'/>
      <address type='pci' domain='0x0000' bus='0x00' slot='0x05' function='0x2'/>
    </controller>
    <controller type='pci' index='0' model='pci-root'/>
    <controller type='ide' index='0'>
      <address type='pci' domain='0x0000' bus='0x00' slot='0x01' function='0x1'/>
    </controller>
    <controller type='virtio-serial' index='0'>
      <address type='pci' domain='0x0000' bus='0x00' slot='0x06' function='0x0'/>
    </controller>
    <interface type='direct'>
      <mac address='52:54:00:1f:c1:d1'/>
      <source dev='ens33' mode='bridge'/>
      <model type='rtl8139'/>
      <address type='pci' domain='0x0000' bus='0x00' slot='0x03' function='0x0'/>
    </interface>
    <serial type='pty'>
      <target type='isa-serial' port='0'>
        <model name='isa-serial'/>
      </target>
    </serial>
    <console type='pty'>
      <target type='serial' port='0'/>
    </console>
    <channel type='spicevmc'>
      <target type='virtio' name='com.redhat.spice.0'/>
      <address type='virtio-serial' controller='0' bus='0' port='1'/>
    </channel>
    <input type='mouse' bus='ps2'/>
    <input type='keyboard' bus='ps2'/>
    <graphics type='spice' autoport='yes'>
      <listen type='address'/>
      <image compression='off'/>
    </graphics>
    <sound model='ich6'>
      <address type='pci' domain='0x0000' bus='0x00' slot='0x04' function='0x0'/>
    </sound>
    <video>
      <model type='qxl' ram='65536' vram='65536' vgamem='16384' heads='1' primary='yes'/>
      <address type='pci' domain='0x0000' bus='0x00' slot='0x02' function='0x0'/>
    </video>
    <redirdev bus='usb' type='spicevmc'>
      <address type='usb' bus='0' port='1'/>
    </redirdev>
    <redirdev bus='usb' type='spicevmc'>
      <address type='usb' bus='0' port='2'/>
    </redirdev>
    <memballoon model='virtio'>
      <address type='pci' domain='0x0000' bus='0x00' slot='0x07' function='0x0'/>
    </memballoon>
  </devices>
</domain>
1
2
3
4
5
6
7
8
9
10
11
12
13
14
15
16
17
18
19
20
21
22
23
24
25
26
27
28
29
30
31
32
33
34
35
36
37
38
39
40
41
42
43
44
45
46
47
48
49
50
51
52
53
54
55
56
57
58
59
60
61
62
63
64
65
66
67
68
69
70
71
72
73
74
75
76
77
78
79
80
81
82
83
84
85
86
87
88
89
90
91
92
93
94
95
96
97
98
99
100
101
102
103
104
105
106
107
108
109
110
111
112
113
114
115
116
117
创建虚拟机: [root@localhost ~]# virsh define /etc/libvirt/qemu/vm2.xml
使用virt-manager进入到虚拟机管理界面,启动虚拟机
Last Updated: 2025/06/18, 08:59:15