 Spring IoC
# Spring IoC
# IoC 是什么
IoC 即控制反转(Inversion of Control,缩写为 IoC)。IoC 又称为依赖倒置原则(设计模式六大原则之一),它的要点在于:程序要依赖于抽象接口,不要依赖于具体实现。它的作用就是用于降低代码间的耦合度。
IoC 的实现方式有两种:
- 依赖注入(Dependency Injection,简称 DI):不通过 new() 的方式在类内部创建依赖类对象,而是将依赖的类对象在外部创建好之后,通过构造函数、函数参数等方式传递(或注入)给类使用。
- 依赖查找(Dependency Lookup):容器中的受控对象通过容器的 API 来查找自己所依赖的资源和协作对象。
理解 Ioc 的关键是要明确两个要点:
- 谁控制谁,控制什么:传统 Java SE 程序设计,我们直接在对象内部通过 new 进行创建对象,是程序主动去创建依赖对象;而 IoC 是有专门一个容器来创建这些对象,即由 Ioc 容器来控制对象的创建;谁控制谁?当然是 IoC 容器控制了对象;控制什么?那就是主要控制了外部资源获取(不只是对象包括比如文件等)。
- 为何是反转,哪些方面反转了:有反转就有正转,传统应用程序是由我们自己在对象中主动控制去直接获取依赖对象,也就是正转;而反转则是由容器来帮忙创建及注入依赖对象;为何是反转?因为由容器帮我们查找及注入依赖对象,对象只是被动的接受依赖对象,所以是反转;哪些方面反转了?依赖对象的获取被反转了。
# IoC 能做什么
IoC 不是一种技术,而是编程思想,一个重要的面向对象编程的法则,它能指导我们如何设计出松耦合、更优良的程序。传统应用程序都是由我们在类内部主动创建依赖对象,从而导致类与类之间高耦合,难于测试;有了 IoC 容器后,把创建和查找依赖对象的控制权交给了容器,由容器进行注入组合对象,所以对象与对象之间是松散耦合,这样也方便测试,利于功能复用,更重要的是使得程序的整个体系结构变得非常灵活。
其实 IoC 对编程带来的最大改变不是从代码上,而是从思想上,发生了“主从换位”的变化。应用程序原本是老大,要获取什么资源都是主动出击,但是在 IoC/DI 思想中,应用程序就变成被动的了,被动的等待 IoC 容器来创建并注入它所需要的资源了。
IoC 很好的体现了面向对象设计法则之一—— 好莱坞法则:“别找我们,我们找你”;即由 IoC 容器帮对象找相应的依赖对象并注入,而不是由对象主动去找。
# IoC 和 DI
其实它们是同一个概念的不同角度描述,由于控制反转概念比较含糊(可能只是理解为容器控制对象这一个层面,很难让人想到谁来维护对象关系),所以 2004 年大师级人物 Martin Fowler 又给出了一个新的名字:“依赖注入”,相对 IoC 而言,“依赖注入”明确描述了“被注入对象依赖,IoC 容器配置依赖对象”。
注:如果想要更加深入的了解 IoC 和 DI,请参考大师级人物 Martin Fowler 的一篇经典文章 Inversion of Control Containers and the Dependency Injection pattern (opens new window)。
# Bean
JavaBean 是一种 JAVA 语言写成的可重用组件。为写成 JavaBean,类必须是具体的和公共的,并且具有无参数的构造器。JavaBean 对外部通过提供 getter / setter 方法来访问其成员。
由 IoC 容器管理的那些组成你应用程序的对象我们就叫它 Bean。Bean 就是由 Spring 容器初始化、装配及管理的对象,除此之外,bean 就与应用程序中的其他对象没有什么区别了。那 IoC 怎样确定如何实例化 Bean、管理 Bean 之间的依赖关系以及管理 Bean 呢?这就需要配置元数据,在 Spring 中由 BeanDefinition 代表,后边会详细介绍,配置元数据指定如何实例化 Bean、如何组装 Bean 等。
# IoC容器
IoC 容器就是具有依赖注入功能的容器。IoC 容器负责实例化、定位、配置应用程序中的对象及建立这些对象间的依赖。应用程序无需直接在代码中 new 相关的对象,应用程序由 IoC 容器进行组装。在 Spring 中 BeanFactory 是 IoC 容器的实际代表者。
Spring IoC 容器如何知道哪些是它管理的对象呢?这就需要配置文件,Spring IoC 容器通过读取配置文件中的配置元数据,通过元数据对应用中的各个对象进行实例化及装配。一般使用基于 xml 配置文件进行配置元数据,而且 Spring 与配置文件完全解耦的,可以使用其他任何可能的方式进行配置元数据,比如注解、基于 java 文件的、基于属性文件的配置都可以。
# Spring IoC容器
org.springframework.beans 和 org.springframework.context 是 IoC 容器的基础。
在 Spring 中,有两种 IoC 容器:BeanFactory 和 ApplicationContext。
BeanFactory:BeanFactory 是 Spring 基础 IoC 容器。BeanFactory 提供了 Spring 容器的配置框架和基本功能。
ApplicationContext:ApplicationContext 是具备应用特性的 BeanFactory 的子接口。它还扩展了其他一些接口,以支持更丰富的功能,如:国际化、访问资源、事件机制、更方便的支持 AOP、在 web 应用中指定应用层上下文等。 实际开发中,更推荐使用 ApplicationContext 作为 IoC 容器,因为它的功能远多于 BeanFactory。 org.springframework.context.ApplicationContext 接口代表 Spring IoC 容器,负责实例化、配置和组装 bean。容器通过读取配置元数据来获取关于要实例化、配置和组装哪些对象的指令。配置元数据以 XML、Java 注释或 Java 代码表示。它允许您表达组成应用程序的对象以及这些对象之间丰富的相互依赖关系。
Spring 提供了 ApplicationContext 接口的几个实现,例如:
ClassPathXmlApplicationContext :ApplicationContext 的实现,从 classpath 获取配置信息。
ApplicationContext context = new ClassPathXmlApplicationContext("classpath.xml");
AnnotationConfigApplicationContext :ApplicationContext 的实现,从注解配置中获取配置信息。
ApplicationContext context = new AnnotationConfigApplicationContext("com.joe");
FileSystemXmlApplicationContext :ApplicationContext 的实现,从文件系统获取配置信息。
ApplicationContext context = new FileSystemXmlApplicationContext("fileSystemConfig.xml");
在大多数应用场景中,不需要显式通过用户代码来实例化 Spring IoC 容器的一个或多个实例。
- 使用 IoC 容器可分为三步骤:
配置元数据:需要配置一些元数据来告诉 Spring,你希望容器如何工作,具体来说,就是如何去初始化、配置、管理 JavaBean 对象。
实例化容器:由 IoC 容器解析配置的元数据。IoC 容器的 Bean Reader 读取并解析配置文件,根据定义生成 BeanDefinition 配置元数据对象,IoC 容器根据 BeanDefinition 进行实例化、配置及组装 Bean。
获取bean:从容器中获取需要的 Bean。
# 配置元数据
**元数据(Metadata)**又称中介数据、中继数据,为描述数据的数据(data about data),主要是描述数据属性(property)的信息。
配置元数据的方式:
基于 xml 配置:Spring 的传统配置方式。通常是在顶级元素
基于注解配置 (opens new window):Spring 2.5 引入了对基于注解的配置元数据的支持。可以大大简化你的配置。
基于 JavaConfig 配置 (opens new window):从 Spring 3.0 开始,Spring 支持使用 Java 代码来配置元数据。通常是在 @Configuration 修饰的类中通过 @Bean 指定实例化 Bean 的方法。
# XML配置元数据
XML基本数据结构 以下示例显示了基于 XML 的配置元数据的基本结构:
<?xml version="1.0" encoding="UTF-8"?>
<beans xmlns="http://www.springframework.org/schema/beans"
       xmlns:xsi="http://www.w3.org/2001/XMLSchema-instance"
       xsi:schemaLocation="http://www.springframework.org/schema/beans
        https://www.springframework.org/schema/beans/spring-beans.xsd">

   <!--id 属性用于唯一标识单个 bean 定义-->
	 <!--class 属性用于指明 bean 类型的完全限定名-->
	 <bean id="..." class="...">
			 <!-- 这里配置 Bean 的属性 -->
	 </bean>

	 <bean id="..." class="...">
			 <!-- 这里配置 Bean 的属性 -->
	 </bean>

	 <!-- 更多的 Bean 定义 -->
</beans>
2
3
4
5
6
7
8
9
10
11
12
13
14
15
16
17
18
19
20
初始化容器
ApplicationContext  context=new ClassPathXmlApplicationContext("application.xml");
ConstructorService constructorService=context.getBean("constructorService", ConstructorService.class);
constructorService.pirnt();
2
3
# 注解配置元数据
以下示例显示了基于 注解 的配置元数据的基本结构:
@Service
public class OrderService {

    @Autowired
    private OrderDao orderDao;

    public void print(){
        orderDao.print();
    }

}
2
3
4
5
6
7
8
9
10
11
12
初始化容器
ApplicationContext context=new AnnotationConfigApplicationContext("com.joe");
OrderService orderService=context.getBean("orderService",OrderService.class);
orderService.print();
2
3
# JavaConfig配置元数据
以下示例显示了基于 JavaConfig 的配置元数据的基本结构:
@Configuration
public class AppConfiguration {

    @Bean
    public OrderDao orderDao(){
        return new OrderDao();
    }

    @Bean
    public OrderService orderService(OrderDao orderDao){
        return new OrderService(orderDao);
    }
}
2
3
4
5
6
7
8
9
10
11
12
13
14
初始化容器
ApplicationContext context=new AnnotationConfigApplicationContext("com.joe");
OrderService orderService=context.getBean("orderService",OrderService.class);
orderService.print();
2
3
# 案例
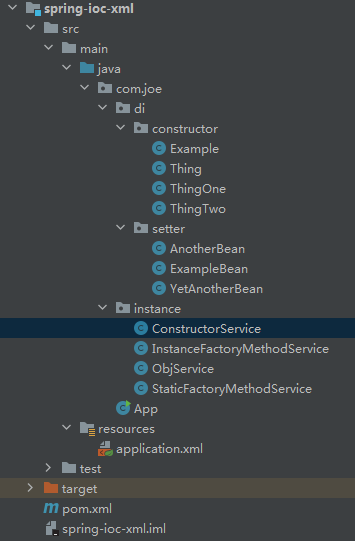
pom.xml文件
<project xmlns="http://maven.apache.org/POM/4.0.0" xmlns:xsi="http://www.w3.org/2001/XMLSchema-instance"
  xsi:schemaLocation="http://maven.apache.org/POM/4.0.0 http://maven.apache.org/xsd/maven-4.0.0.xsd">
  <modelVersion>4.0.0</modelVersion>

  <groupId>cjoeom.</groupId>
  <artifactId>spring-init-xml</artifactId>
  <version>1.0-SNAPSHOT</version>
  <packaging>jar</packaging>

  <name>spring-init-xml</name>
  <url>http://maven.apache.org</url>

  <properties>
    <project.build.sourceEncoding>UTF-8</project.build.sourceEncoding>
  </properties>

  <dependencies>
    <dependency>
      <groupId>junit</groupId>
      <artifactId>junit</artifactId>
      <version>3.8.1</version>
      <scope>test</scope>
    </dependency>

    <dependency>
      <groupId>org.springframework</groupId>
      <artifactId>spring-context</artifactId>
      <version>6.1.6</version>
    </dependency>

  </dependencies>

  <build>
    <plugins>
      <plugin>
        <groupId>org.apache.maven.plugins</groupId>
        <artifactId>maven-compiler-plugin</artifactId>
        <configuration>
          <source>17</source>
          <target>17</target>
        </configuration>
      </plugin>
    </plugins>
  </build>
</project>
2
3
4
5
6
7
8
9
10
11
12
13
14
15
16
17
18
19
20
21
22
23
24
25
26
27
28
29
30
31
32
33
34
35
36
37
38
39
40
41
42
43
44
45
application.xml文件
<?xml version="1.0" encoding="UTF-8"?>
<beans xmlns="http://www.springframework.org/schema/beans"
       xmlns:xsi="http://www.w3.org/2001/XMLSchema-instance"
       xsi:schemaLocation="http://www.springframework.org/schema/beans
        https://www.springframework.org/schema/beans/spring-beans.xsd">

    <bean id="constructorService" class="com.joe.instance.ConstructorService"></bean>

    <bean id="staticFactoryMethodService" class="com.joe.instance.StaticFactoryMethodService" factory-method="createInstance"></bean>

    <bean id="instanceFactoryMethodService" class="com.joe.instance.InstanceFactoryMethodService"></bean>
    <bean id="objService" factory-bean="instanceFactoryMethodService" factory-method="createInstance"></bean>


<!--    依赖注入-->
<!--    通过构造器方式进行依赖注入-->
    <bean id="example" class="com.joe.di.constructor.Example">
        <constructor-arg name="name" value="张三"></constructor-arg>
        <constructor-arg name="age" value="21"></constructor-arg>
    </bean>

    <bean id="thing" class="com.joe.di.constructor.Thing">
        <constructor-arg name="thingOne" ref="thingOne"></constructor-arg>
        <constructor-arg name="thingTwo" ref="thingTwo"></constructor-arg>
    </bean>
    <bean id="thingOne" class="com.joe.di.constructor.ThingOne"></bean>
    <bean id="thingTwo" class="com.joe.di.constructor.ThingTwo"></bean>

    <!--    通过setter方式进行依赖注入-->
    <bean id="exampleBean" class="com.joe.di.setter.ExampleBean">
        <property name="anotherBean" ref="anotherBean"></property>
        <property name="yetAnotherBean" ref="yetAnotherBean"></property>
    </bean>
    <bean id="anotherBean" class="com.joe.di.setter.AnotherBean"></bean>
    <bean id="yetAnotherBean" class="com.joe.di.setter.YetAnotherBean"></bean>
</beans>
2
3
4
5
6
7
8
9
10
11
12
13
14
15
16
17
18
19
20
21
22
23
24
25
26
27
28
29
30
31
32
33
34
35
36
ConstructorService
package com.joe.instance;

public class ConstructorService {

    public void pirnt(){
        System.out.println("通过构造函数方式进行实例化");
    }
}
2
3
4
5
6
7
8
9
StaticFactoryMethodService
public class StaticFactoryMethodService {

    private static StaticFactoryMethodService staticFactoryMethodService=new StaticFactoryMethodService();

    public static StaticFactoryMethodService createInstance(){
        return staticFactoryMethodService;
    }

    public void print(){
        System.out.println("通过静态工厂方法方式创建实例");
    }
}
2
3
4
5
6
7
8
9
10
11
12
InstanceFactoryMethodService
public class InstanceFactoryMethodService {

    public ObjService ObjService=new ObjService();

    public ObjService createInstance(){
        return ObjService;
    }
}
2
3
4
5
6
7
8
9
ObjService
public class ObjService {

    public void print(){
        System.out.println("通过实例工厂方法方式创建对象");
    }
}
2
3
4
5
6
7
Example
public class Example {

    private String name;
    private Integer age;

    public Example(String name, Integer age) {
        this.name = name;
        this.age = age;
    }

    public String getName() {
        return name;
    }

    public void setName(String name) {
        this.name = name;
    }

    public Integer getAge() {
        return age;
    }

    public void setAge(Integer age) {
        this.age = age;
    }
}
2
3
4
5
6
7
8
9
10
11
12
13
14
15
16
17
18
19
20
21
22
23
24
25
26
Thing
public class Thing {

    private ThingOne thingOne;
    private ThingTwo thingTwo;

    public Thing(ThingOne thingOne, ThingTwo thingTwo) {
        this.thingOne = thingOne;
        this.thingTwo = thingTwo;
    }

    public ThingOne getThingOne() {
        return thingOne;
    }

    public void setThingOne(ThingOne thingOne) {
        this.thingOne = thingOne;
    }

    public ThingTwo getThingTwo() {
        return thingTwo;
    }

    public void setThingTwo(ThingTwo thingTwo) {
        this.thingTwo = thingTwo;
    }

    public String toString(){
        return "thingOne="+thingOne+" thingTwo="+thingTwo;
    }
}
2
3
4
5
6
7
8
9
10
11
12
13
14
15
16
17
18
19
20
21
22
23
24
25
26
27
28
29
30
31
ThingOne和ThingTwo
public class ThingOne {
}

内容都为空
2
3
4
5
ExampleBean
public class ExampleBean {

    private AnotherBean anotherBean;
    private YetAnotherBean yetAnotherBean;

    public AnotherBean getAnotherBean() {
        return anotherBean;
    }

    public void setAnotherBean(AnotherBean anotherBean) {
        this.anotherBean = anotherBean;
    }

    public YetAnotherBean getYetAnotherBean() {
        return yetAnotherBean;
    }

    public void setYetAnotherBean(YetAnotherBean yetAnotherBean) {
        this.yetAnotherBean = yetAnotherBean;
    }

    public String toString(){
        return "anotherBean="+anotherBean+" yetAnotherBean="+yetAnotherBean;
    }
}
2
3
4
5
6
7
8
9
10
11
12
13
14
15
16
17
18
19
20
21
22
23
24
25
AnotherBean和YetAnotherBean
public class AnotherBean {
}

内容都为空
2
3
4
App启动类
public class App
{
    public static void main( String[] args )
    {


        /**
         * IOC 控制反转
         * DI
         * 自己new一个对象 控制权是在你自己手里
         *
         * IOC控制反转 就是new一个对象不用你自己来new,创建对象的过程由spring 来进行创建,你只需要使用即可
         *
         */


        /**
         * 通过构造函数进行实例化
         */
        ApplicationContext  context=new ClassPathXmlApplicationContext("application.xml");
        ConstructorService constructorService=context.getBean("constructorService", ConstructorService.class);
        constructorService.pirnt();

        /**
         * 通过静态工厂方法方式创建实例
         */
        StaticFactoryMethodService staticFactoryMethodService= context.getBean("staticFactoryMethodService", StaticFactoryMethodService.class);
        staticFactoryMethodService.print();

        /**
         * 通过实例工厂方法方式创建实例
         */
        ObjService objService=context.getBean("objService", ObjService.class);
        objService.print();


        /**
         * 依赖注入
         */

        System.out.println("------------------通过构造器进行依赖注入-------------------");
        Example example=context.getBean("example",Example.class);
        System.out.println(example.getName());

        Thing thing=context.getBean("thing", Thing.class);
        System.out.println(thing.toString());

        System.out.println("-------------------通过setter方式进行依赖注入-------------------");
        ExampleBean exampleBean=context.getBean("exampleBean", ExampleBean.class);
        System.out.println(exampleBean.toString());
    }
}
2
3
4
5
6
7
8
9
10
11
12
13
14
15
16
17
18
19
20
21
22
23
24
25
26
27
28
29
30
31
32
33
34
35
36
37
38
39
40
41
42
43
44
45
46
47
48
49
50
51
52